Step 2: Changing Settings
The next step is to give LinkMachine some information about your site. From the Site List page, go to the Settings page
by pressing the Change Settings button in the control panel.
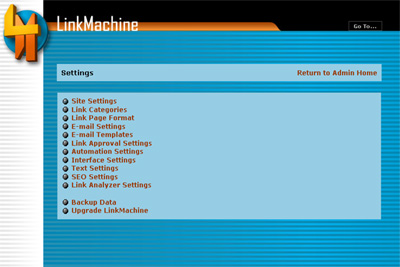
The Settings page.

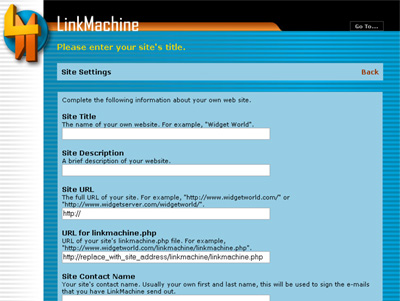
The top of the Site Settings page.
Next, click the Back link to return to the Settings Page, and from there go to the Link Categories page. Your site's link pages can be organized into any number of categories (and subcategories) of your choosing. Here is where you enter the names of your link categories. Think of what sorts of websites you'll be inviting to exchange links with your site. LinkMachine will only display a category on your link pages if there's at least one site in that category to list, so don't worry about adding categories that may remain empty for a while.

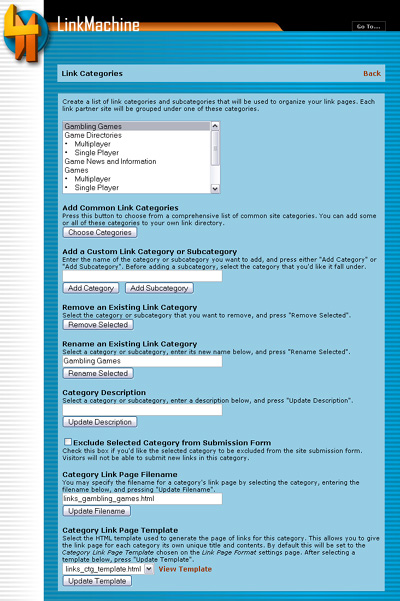
The Link Categories page.
To add a category of your own, enter its name under Add a New Link Category or Subcategory and click the Add Category button. To add a subcategory, select the category for it to fall under, enter its name, and click Add Subcategory instead. To remove a category, select it from the list of categories and click the Remove button. Take a moment to add a few link categories. You can always add more or remove categories later.
To rename an existing category, select the category from the list, enter its new name under Rename an Existing Link Category, and click the Rename Selected button.
Under Category Description you can enter descriptions of your categories and subcategories, if you wish. The Category Link Page Template section is only used if you'd like each category's link page to have its own unique look. You can skip this for now.
Press the Back link to return to the Settings Page. The Link Page Format page is used to customize the look of your site's link pages. The E-mail Templates page is used to customize the e-mails that you'll be sending out to webmasters of sites you'd like to exchange links with. We'll look at these sections in detail a bit later.
Near the bottom of the list is the Backup Data link, to the page where you can download a backup copy of your site's LinkMachine data, and upload a data file to replace your site's current data. It's a good idea to download a backup copy of the data every so often, especially after adding a bunch of sites or making other significant changes, just in case anything goes wrong. From the Backup Data page you can also export all of your links as a .csv file, which can be loaded into a spreadsheet application such as Excel. You can use this to generate reports, or to transfer your links from one copy of LinkMachine to another.
The last link on the Settings page, Upgrade LinkMachine, leads to the page where you can upgrade to LinkMachine Premium. If you've purchased LinkMachine Premium, you can use it on up to 3 different web sites. To use your LinkMachine account on more than three websites, you'll need to purchase additional site licenses. This page is also where that can be done.
Return to the main site list page by clicking on Return to Admin Home at the top of the Settings page. Now, it's time to find some sites to exchange links with!
Continue to Step 3: Adding Sites
115 Park Ave. Cranston RI 02905 USA
We welcome your questions and comments! Click here to contact IronZog.
 Home
Home